Istio是什么
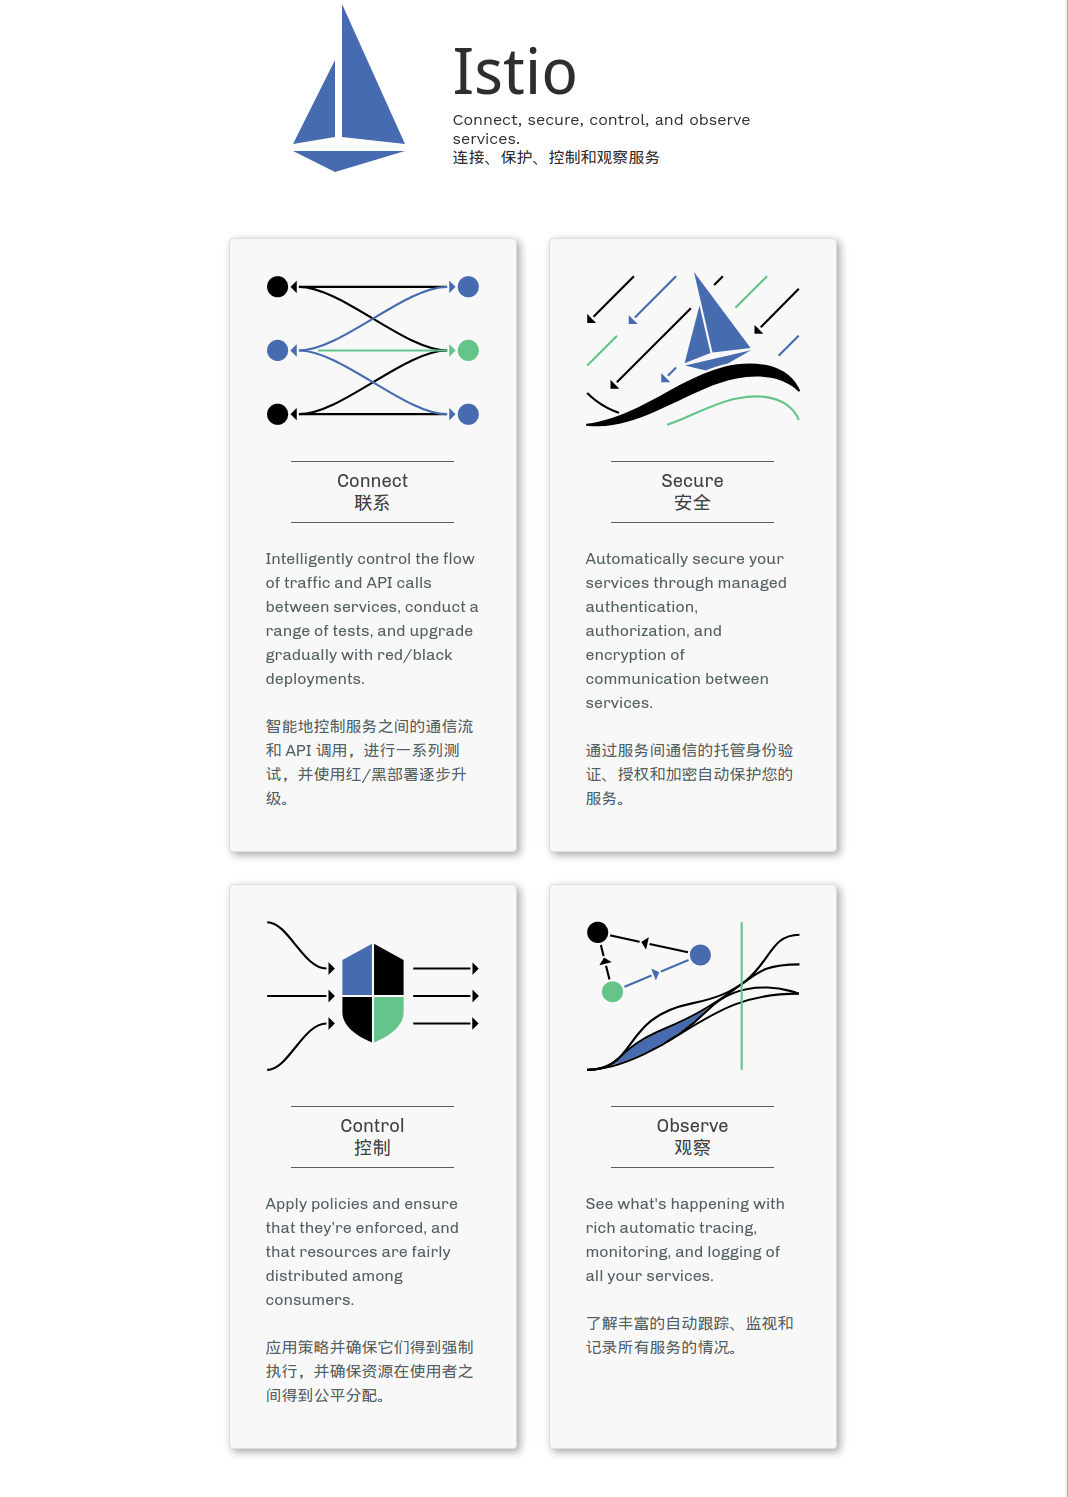
Istio官网对其的定义
- Connect:可以控制流量,进行熔断限流以及渐进部署
- Secure:对微服务之间的通讯进行加密身份验证
- Control: 对不同的请求进行负载均衡和资源分配
- Observe: 提供各种服务面,可以通过Kaili进行监控
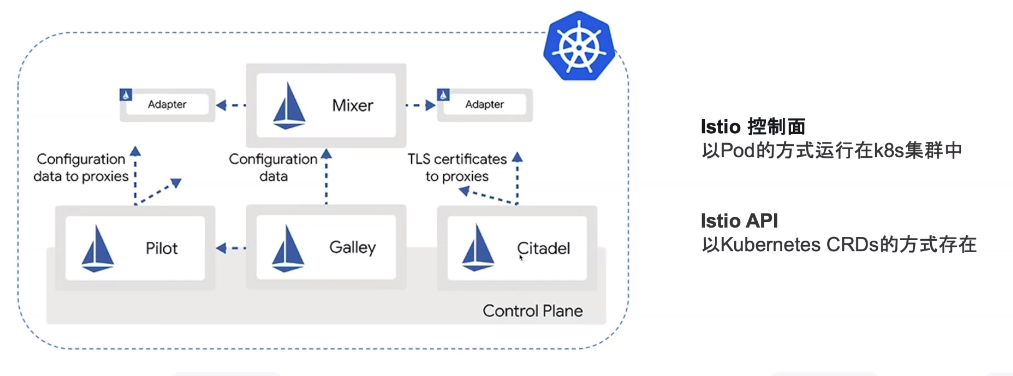
Istio的组件
1.6之前的架构
1.6之后的架构
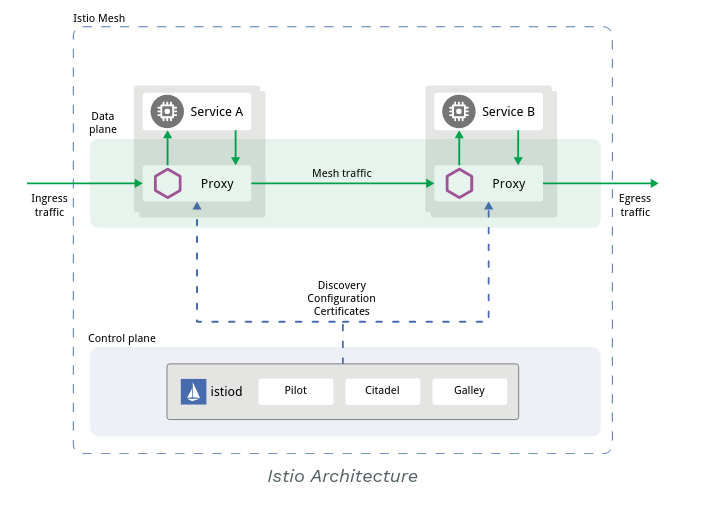
我们可以注意到原先的解耦组件集成为了一个istiod,并且去除了Mixer
下载Istio
这里是在minikube环境下进行istio安装的,需要先安装minikube,可以参考我之前写的Arch 下安装minikube
下载istio
//下载最新版本
curl -L https://istio.io/downloadIstio | sh -
//如果需要指定版本的话
curl -L https://istio.io/downloadIstio | ISTIO_VERSION=1.4.3 sh -
进入下载好的istio目录
cd istio-1.6.5 //这里不一定这个目录名,以下载的为主
将istio安装包中bin目录加入到PATH
$export PATH=$PWD/bin:$PATH // $PWD表示istio的安装包目录
安装Istio
运行命令通过demo文件安装
$istioctl install --set profile=demo
✔ Istio core installed
✔ Istiod installed
✔ Egress gateways installed
✔ Ingress gateways installed
✔ Addons installed
✔ Installation complete
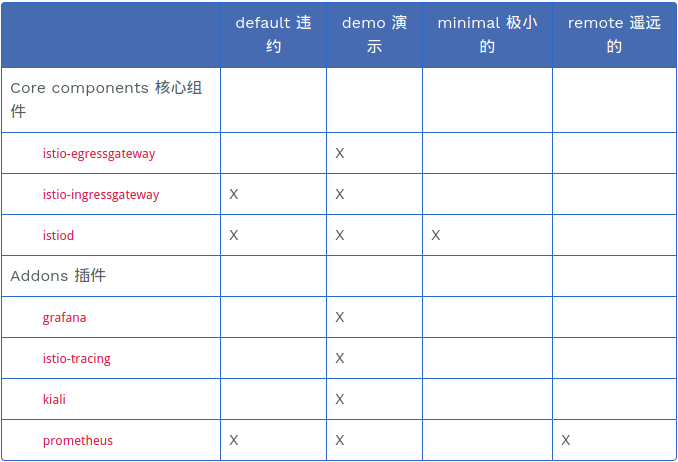
其中profile是内置的一些配置文件
中间如果出现error installer Failed to wait for resource问题可以运行
$istioctl manifest apply
部署BookInfo官方实例应用
部署官方应用,其对应配置就保存在istio的源码包里面
$kubectl apply -f samples/bookinfo/platform/kube/bookinfo.yaml
service/details created
serviceaccount/bookinfo-details created
deployment.apps/details-v1 created
service/ratings created
serviceaccount/bookinfo-ratings created
deployment.apps/ratings-v1 created
service/reviews created
serviceaccount/bookinfo-reviews created
deployment.apps/reviews-v1 created
deployment.apps/reviews-v2 created
deployment.apps/reviews-v3 created
service/productpage created
serviceaccount/bookinfo-productpage created
deployment.apps/productpage-v1 created
可以查看一下对应的service和pod是否有启动起来了
$kubectl get services
NAME          TYPE        CLUSTER-IP      EXTERNAL-IP   PORT(S)    AGE
details       ClusterIP   10.0.0.212      <none>        9080/TCP   29s
kubernetes    ClusterIP   10.0.0.1        <none>        443/TCP    25m
productpage   ClusterIP   10.0.0.57       <none>        9080/TCP   28s
ratings       ClusterIP   10.0.0.33       <none>        9080/TCP   29s
reviews       ClusterIP   10.0.0.28       <none>        9080/TCP   29s

$ kubectl get pods
NAME                              READY   STATUS            RESTARTS   AGE
details-v1-78d78fbddf-tj56d       0/2     PodInitializing   0          2m30s
productpage-v1-85b9bf9cd7-zg7tr   0/2     PodInitializing   0          2m29s
ratings-v1-6c9dbf6b45-5djtx       0/2     PodInitializing   0          2m29s
reviews-v1-564b97f875-dzdt5       0/2     PodInitializing   0          2m30s
reviews-v2-568c7c9d8f-p5wrj       1/2     Running           0          2m29s
reviews-v3-67b4988599-7nhwz       0/2     PodInitializing   0          2m29s
查看bookinfo项目是否运行正常
$ kubectl exec -it $(kubectl get pod -l app=ratings -o jsonpath='{.items[0].metadata.name}') -c ratings -- curl productpage:9080/productpage | grep -o "<title>.*</title>"
<title>Simple Bookstore App</title>
开放外部通讯
将此应用程序与 Istio 网关关联:
$ kubectl apply -f samples/bookinfo/networking/bookinfo-gateway.yaml
gateway.networking.istio.io/bookinfo-gateway created
virtualservice.networking.istio.io/bookinfo created
确保配置没有问题
$ istioctl analyze
✔ No validation issues found when analyzing namespace: default.
获取访问的ip和端口
下面是针对minikueb环境
设置入口端口环境变量
$ export INGRESS_PORT=$(kubectl -n istio-system get service istio-ingressgateway -o jsonpath='{.spec.ports[?(@.name=="http2")].nodePort}')
$ export SECURE_INGRESS_PORT=$(kubectl -n istio-system get service istio-ingressgateway -o jsonpath='{.spec.ports[?(@.name=="https")].nodePort}')
确保成功地为每个环境变量分配一个端口:
$ echo $INGRESS_PORT
32194

$ echo $SECURE_INGRESS_PORT
31632
设置访问地址环境变量
export INGRESS_HOST=$(minikube ip)
在一个新的终端窗口中运行这个命令,启动一个 Minikube 隧道,将流量发送到 Istio Ingress Gateway
$minikube tunnel
设置网址
$ export GATEWAY_URL=$INGRESS_HOST:$INGRESS_PORT
$ echo $GATEWAY_URL
192.168.99.100:32194
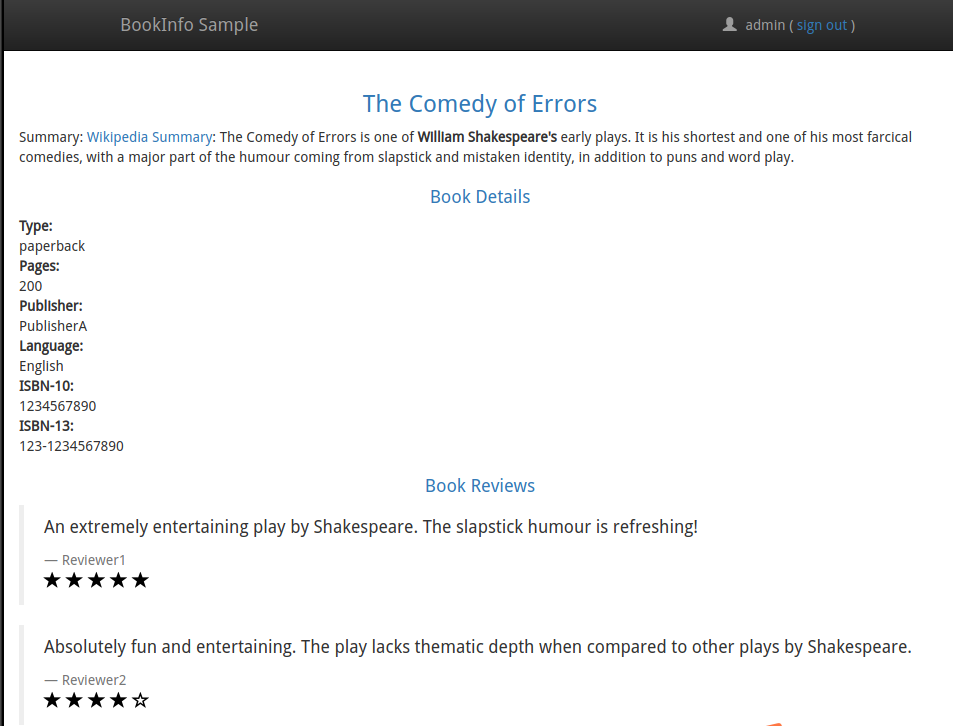
然后我们访问,就可以看到项目界面了
$echo http://$GATEWAY_URL/productpage
//输出网址
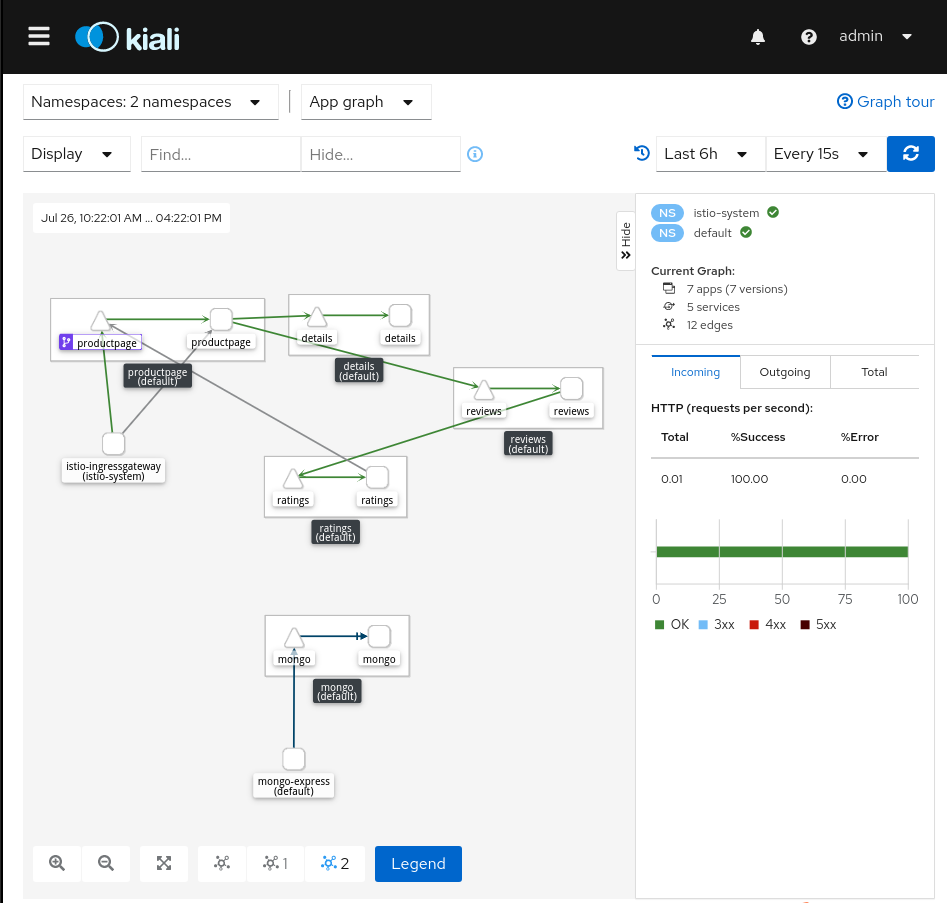
查看Istio仪表盘
$stioctl dashboard kiali
http://localhost:39449/kiali